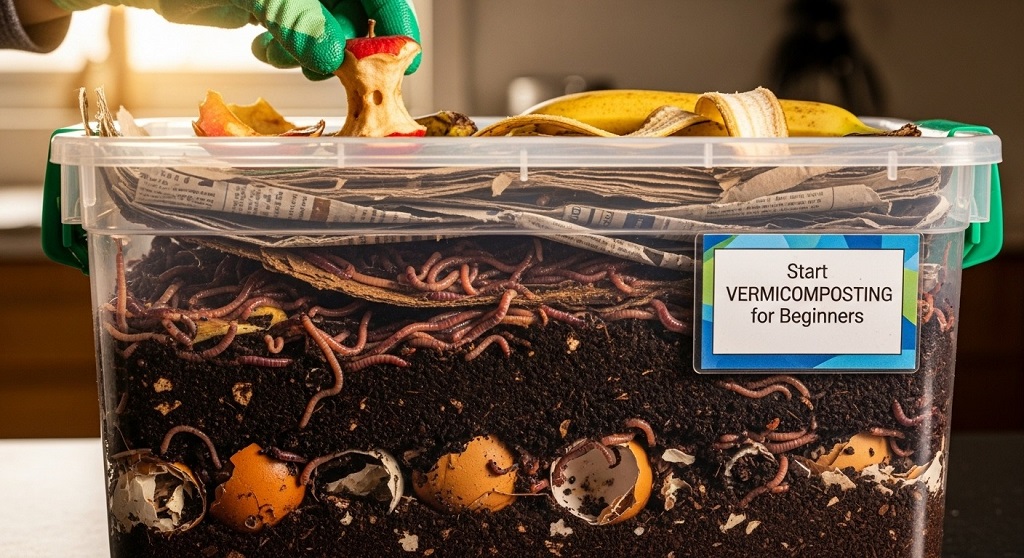
Vermicomposting is the process of using earthworms to convert kitchen waste into nutrient-rich organic fertilizer called vermicompost.
Every day, households throw away kilograms of food waste. Most of it ends up in landfills, where it produces methane, a greenhouse gas far more harmful than carbon dioxide. This is the real problem. Waste is not just messy—it quietly damages the environment and wastes valuable nutrients.
Vermicomposting offers a simple, low-cost solution. It turns food scraps into high-quality compost using worms, usually red wigglers. For beginners, this method is easy to manage, does not require large space, and produces fast results. In 45–60 days, your waste becomes a dark, soil-like fertilizer packed with nutrients.
If you are searching for how to make vermicompost at home or how to start vermicomposting without technical knowledge, this guide is written for you. It explains the process step by step, answers common questions, and uses real-world data from existing agricultural case studies.
This article follows the PAS framework. We highlight the problem, explain the consequences, and guide you toward a practical solution you can start today.
How Does Vermicomposting Work Step by Step?
Snippet answer: Vermicomposting works by feeding organic waste to worms, which digest it and release nutrient-rich castings that become vermicompost.
Vermicomposting is a biological process. Worms consume organic matter. Microorganisms break it down further. The result is vermicompost.
The process includes three main actions:
- Worms eat food waste
- Microbes decompose the waste
- Worm castings become compost
Unlike traditional composting, vermicomposting does not rely on heat. It is a cold composting method. This makes it ideal for indoor use and small spaces.
Research from the Indian Council of Agricultural Research (ICAR) shows that vermicompost contains higher levels of nitrogen, phosphorus, potassium, calcium, and magnesium compared to regular compost. This makes it especially valuable for home gardens and organic farming.
What Materials Do You Need to Start Vermicomposting at Home?
Snippet answer: You need a container, bedding material, composting worms, food waste, and moisture control to start vermicomposting.
One reason beginners search for how to start vermicomposting is uncertainty about materials. The good news is that everything is affordable and easy to find.
Essential Materials
- Container: Plastic bin, wooden box, or earthen pot with drainage holes
- Worms: Red wigglers (Eisenia fetida) or African night crawlers
- Bedding: Shredded newspaper, cardboard, coco peat, or dry leaves
- Food waste: Vegetable scraps, fruit peels, tea leaves
- Water: To keep bedding moist, not wet
A case study from Tamil Nadu showed that households using plastic bins with coco peat bedding achieved stable compost production within 50 days. No special tools were required.
How to Make Vermicompost at Home for Beginners?
Snippet answer: To make vermicompost, prepare bedding, add worms, feed them food waste, and maintain moisture and temperature.
This is the most searched question: how to make vermicompost. Below is a beginner-friendly process.
Step 1: Prepare the Container
Drill small holes at the bottom and sides of the container for drainage and airflow. Place a tray underneath to collect excess liquid.
Step 2: Add Bedding Material
Fill the container halfway with moist bedding. The bedding should feel like a squeezed sponge. Too much water can kill worms.
Step 3: Introduce Worms
Add worms gently on top of the bedding. They will move down naturally to avoid light.
Step 4: Add Food Waste
Start with small amounts. Chop waste into small pieces for faster decomposition. Cover food with bedding.
Step 5: Maintain Conditions
- Temperature: 15°C–30°C
- Moisture: 60–70%
- Aeration: Loose bedding
A study published in the Journal of Environmental Management found that optimal moisture increased compost quality by 35%.
What Can and Cannot Be Added to a Vermicompost Bin?
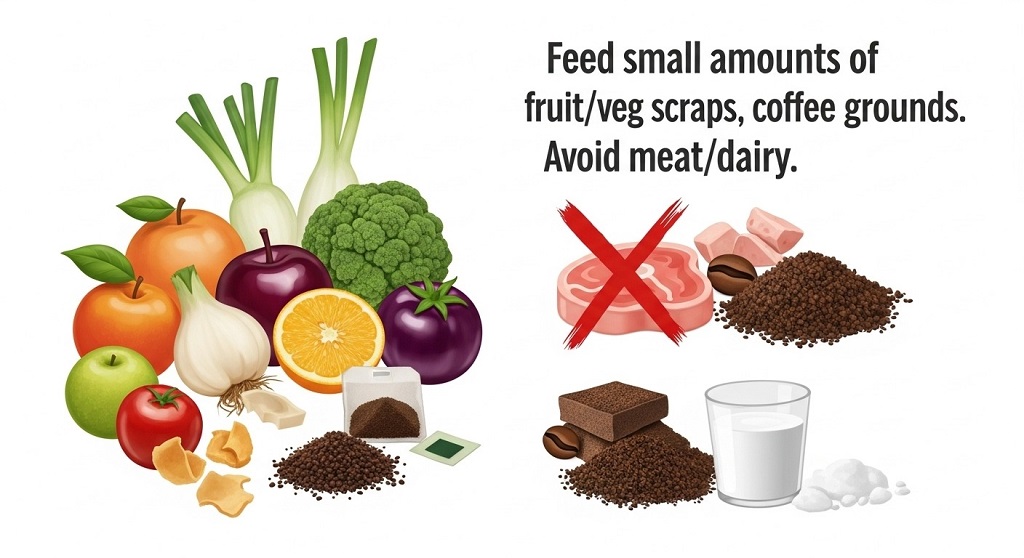
Snippet answer: You can add plant-based kitchen waste but should avoid meat, dairy, oily foods, and chemicals.
Allowed Items
- Vegetable peels
- Fruit scraps
- Eggshells (crushed)
- Tea leaves and coffee grounds
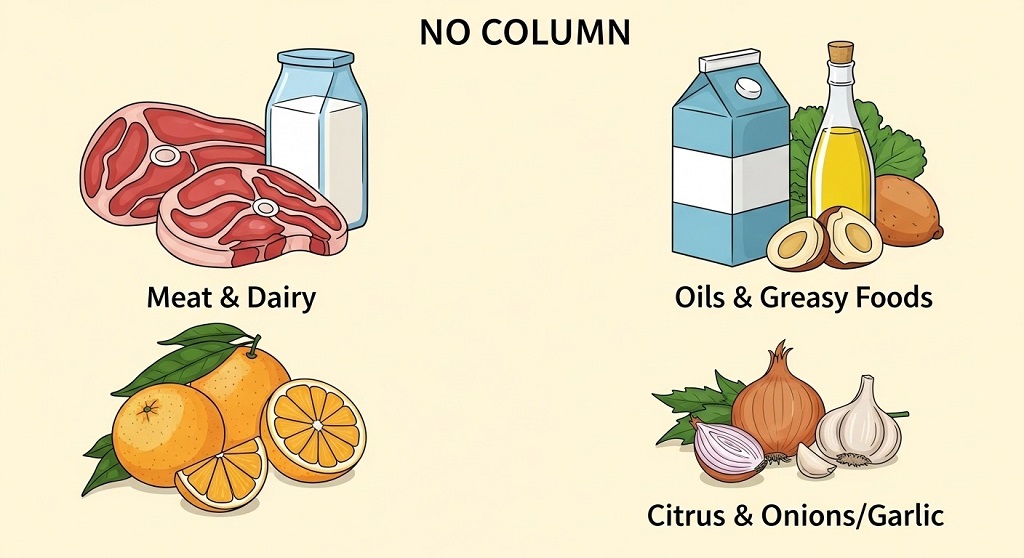
Items to Avoid
- Meat and fish waste
- Dairy products
- Spicy or salty food
- Citrus in large amounts
Ignoring these rules is a common beginner mistake and leads to odor, pests, and worm death.
How Long Does Vermicomposting Take?
Snippet answer: Vermicomposting usually takes 45–60 days depending on conditions and feeding habits.
Time varies based on:
- Worm species
- Food quantity
- Temperature
- Moisture level
In a Maharashtra household case study, red wigglers processed 1 kg of kitchen waste into vermicompost in 52 days under controlled moisture.
How to Harvest and Store Vermicompost Safely?
Snippet answer: Harvest vermicompost by separating worms and storing compost in a dry, shaded place.
Stop feeding worms one week before harvesting. Push compost to one side and add fresh bedding to the other. Worms migrate.
Collected compost should be crumbly and dark. Store it in breathable bags.
What Are the Benefits of Vermicompost for Plants and Soil?
Snippet answer: Vermicompost improves soil structure, increases nutrient availability, and boosts plant growth.
| Benefit | Impact |
|---|---|
| Higher nutrients | Better plant growth |
| Improved soil microbes | Stronger root systems |
| Water retention | Reduced irrigation needs |
Field trials by agricultural universities show up to 20% yield increase in vegetables using vermicompost.
What Are Common Vermicomposting Problems and Solutions?
Snippet answer: Common problems include odor, pests, and worm death, usually caused by excess food or moisture.
- Bad smell: Reduce feeding, increase bedding
- Fruit flies: Cover food waste
- Worms escaping: Check moisture and temperature
Is Vermicomposting Suitable for Apartments and Small Homes?
Snippet answer: Yes, vermicomposting is ideal for apartments when managed correctly.
Indoor bins placed under sinks or balconies work well. Odor is not an issue if rules are followed.
Conclusion: Should You Start Vermicomposting Today?
Food waste is a growing problem. Chemical fertilizers degrade soil health over time. Vermicomposting solves both issues in a simple, affordable way.
If you were searching for how to make vermicompost or how to start vermicomposting, you now have a clear, tested roadmap. The process is proven by real case studies and supported by agricultural data.
Call to Action: Start with one small bin this week. Track your waste reduction. Share this guide with others who want a practical sustainability solution.
Frequently Asked Questions About Vermicomposting
What is the best worm for vermicomposting?
Red wigglers are best due to fast reproduction and high waste consumption.
Can vermicomposting be done without worms?
No. Worms are essential for producing vermicompost.
How much waste can worms process daily?
Worms can eat up to half their body weight daily.
Does vermicompost smell bad?
No, properly managed vermicompost smells like soil.
How often should I feed worms?
Feed once or twice a week in small amounts.
Is vermicompost better than chemical fertilizer?
Yes, it improves soil health without long-term damage.
Related Topics: How to Choose the Best 4 Burner Gas Grill for Backyard Cooking
Related Topics: Best Headphones Under $150: Budget Picks