
A deck is a fantastic addition to any home, providing a space for relaxation, entertainment, and enjoying the outdoors. However, over time, exposure to the elements can cause wear and tear, including the development of cracks. While a crack in your deck may seem alarming, it’s usually a manageable repair that you can tackle yourself with the right tools and approach. This article will guide you through the process, ensuring the crack in your deck remains safe and beautiful for years to come.
Understanding Cracks in Decks
Before diving into the repair process, it’s important to understand the different types of cracks and their causes.
- Hairline Cracks: These are thin, superficial cracks that often appear due to natural wood movement or minor weathering. While they may not be a structural concern, they can worsen if left untreated.
- Surface Cracks: These are wider and deeper cracks that can result from moisture penetration, heavy loads, or improper installation. They can compromise the deck’s integrity and require prompt attention.
- Structural Cracks: These are the most severe cracks that extend through the entire board or affect the framing, potentially compromising the deck’s stability and posing a safety hazard. For instance, if you notice structural issues similar to those in a magneto complete skateboard, it’s crucial to consult a professional for assessment and repair.
Assessing the Crack
Before you start any repair work, it’s essential to assess the crack to determine the appropriate course of action. Consider the following:
- Size and Depth: Measure the length and width of the crack and try to gauge its depth. This will help you choose the right repair materials and techniques.
- Location: Identify where the crack is located. Is it on the surface of the board, along the edges, or near the fasteners? This will influence your repair approach.
- Cause: If possible, determine the cause of the crack. This will help prevent future cracks and ensure the repair is effective.
Tools and Materials
Once you’ve assessed the crack, gather the necessary tools and materials for the repair. The specific items will depend on the type and severity of the crack, but some common tools and materials include:
- Safety Gear: Gloves, safety glasses, and a dust mask
- Cleaning Supplies: Broom, brush, and a wood cleaner
- Repair Materials: Wood filler, epoxy, or wood putty
- Tools: Putty knife, chisel, sandpaper, saw, drill, and fasteners
- Finishing Supplies: Stain, sealant, or paint
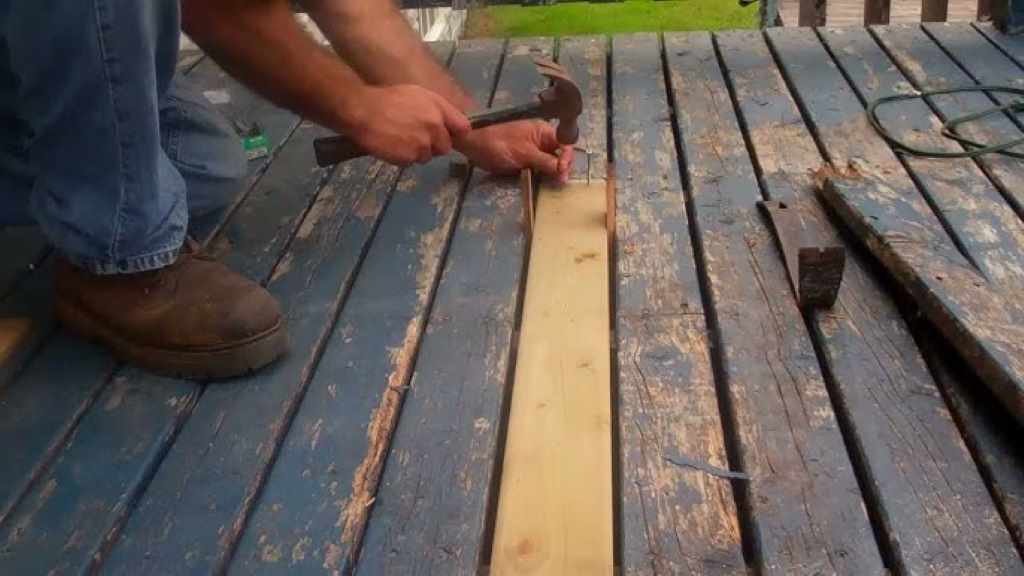
Repairing the Crack
Now that you have everything you need, let’s move on to the repair process.
1. Prepare the Area
- Clean the Crack: Thoroughly clean the crack and the surrounding area to remove any dirt, debris, or loose wood fibers. This will ensure proper adhesion of the repair materials.
- Remove Damaged Wood: If there are any splintered or rotted areas, carefully remove them with a chisel or saw. Create a clean, even surface for the repair.
2. Fill the Crack
The method for filling the crack will depend on its size and depth.
- Hairline Cracks: For minor hairline cracks, wood filler or wood putty may be sufficient. Apply the filler with a putty knife, overfilling slightly. Allow it to dry completely, then sand it smooth and flush with the surface.
- Surface Cracks: For wider surface cracks, epoxy or a two-part wood filler may be necessary. Mix the epoxy according to the manufacturer’s instructions and apply it to the crack with a putty knife. Ensure the epoxy penetrates the crack completely. Allow it to cure, then sand it smooth.
- Deep Cracks: For deeper cracks, you may need to reinforce the repair with additional material. Consider using wood blocks or dowels to provide extra support. Apply epoxy to the crack and insert the reinforcement material. Allow it to cure, then sand it smooth.
3. Sand and Finish
Once the repair material has dried and cured, sand the area smooth to ensure a seamless transition with the surrounding wood. Start with a coarse-grit sandpaper and gradually move to a finer grit for a smooth finish.
4. Protect the Repair
To protect the repair and prevent future cracks, apply a stain, sealant, or paint to the entire deck. This will help protect the wood from moisture, UV rays, and other damaging elements.
Tips for a Successful Repair
- Choose the Right Repair Material: Select a repair material that is suitable for the type and severity of the crack. Consider the weather conditions and the type of wood your deck is made from.
- Follow the Manufacturer’s Instructions: Carefully read and follow the instructions provided with the repair materials. This will ensure proper application and curing.
- Work in Dry Conditions: Avoid repairing cracks in wet or humid conditions. Moisture can affect the adhesion of the repair materials and compromise the repair.
- Be Patient: Allow ample time for the repair materials to dry and cure completely before sanding or applying any finishes.
- Maintain Your Deck: Regularly inspect your deck for signs of wear and tear and address any issues promptly. This will help prevent cracks and prolong the life of your deck.
When to Call a Professional
While many cracks can be repaired DIY, there are situations where it’s best to call a professional.
- Structural Cracks: If you suspect a structural crack, it’s crucial to consult a professional for assessment and repair.
- Extensive Damage: If your deck has extensive damage or multiple cracks, a professional can provide a comprehensive repair solution.
- Lack of Experience: If you’re uncomfortable tackling the repair yourself or lack the necessary tools and skills, a professional can ensure the job is done correctly and safely.
Conclusion
A crack in your deck doesn’t have to be a cause for panic. With the right tools, materials, and approach, you can repair the crack and restore your deck’s beauty and functionality. Remember to assess the crack carefully, choose the appropriate repair method, and follow the instructions provided with the repair materials. By taking proactive steps to maintain your deck, you can enjoy it for many years to come.